Category → RVing
Directional cell antenna for the RV
Our RV came with a TV antenna that can be raised, lowered, and rotated (demo video). I removed the TV antenna and installed a directional cell antenna:


The antenna connects to a 12V booster in the RV which has a flat antenna that phone is placed on. Using the phone’s signal meter, it looks like I’m getting a 40db gain relative to the phone’s internal antenna. This should help us stay in touch even when we’re out in the middle of nowhere.
RV show!
We went to the RV show at RCC last Sunday. Some really nice units were on display, which helps firm up our retirement fantasies.

I’ll take one of each, please.
The new RV
Our trusty Trailmanor has served us well since early 2009, but the layout has its limitations:

My parents bought this unit for themselves, and for two people, it’s perfect. Mechel and Baila sleep on the converted dinette, so when they go to bed, there’s nowhere for us to sit.
Since we now have the Sorento, which can tow 5000 pounds, we decided to purchase a conventional travel trailer. We wanted a bunkhouse model, and settled on the Forest River Wildwood X-Lite 26BH:


It weighs 4300 pounds, about 1100 pounds more than the Trailmanor. Many other manufacturers produce the same floor plan, but the X-Lite is 300-500 pounds lighter, thanks to its stamped frame and other innovations:

I drove out to Lakeview, Ohio to pick up the unit over Labor Day weekend. The drive back made me really appreciate the TrailManor’s towing characteristics. This one doesn’t fold down, so it is much more affected by crosswinds and passing semis. I installed anti-sway friction bars at the dealership, and that did seem to help quite a bit.
I’ve already installed a digital thermostat, and moved the pre-charged pressure tanks over from the TrailManor. Since there’s no folding now, I didn’t use the Banjo removable connectors and a flexible hose. Instead I used PEX and hard-plumbed the tanks in under the sofa.
Here are photos of our unit:


Know anyone who wants a 2007 TrailManor 2720SD? Ours is now for sale.
We’re going up to Mongaup Pond this weekend, we’ll see how it goes!
New wheels for the RV
To make sure we didn’t have any more blowouts on the RV, I wanted to transition to a higher weight capacity tire. Unfortunately, they’re not readily available on a 14” wheel, so I decided to upgrade to 15” wheels, which are standard on Trailmanors starting in 2009. The old and new wheels:
The new wheels wont fit in the wheel well, so I had to add spacers between the axle and chassis to increase the clearance. The spacer is the darker piece of square tubing in the center of the photograph:

I tack welded the axle to the spacer and the spacer to the chassis:

Once the spacers were installed, I was able to install the larger wheels. We now have a weight limit of 2560 pounds per tire, as opposed to 1700 pounds per tire with the 14” wheels.
In the process of hooking everything back up, I discovered that one of the brakes wasn’t working. I ordered new magnets, and when I took the hub apart, found that the wires had been broken by the strain relief clip.
Anyway, I replaced the magnet (the bar-of-soap sized thing below the axle hole). It was a real mess, but it gave me a chance to see how the brakes worked, which was interesting.
Still more RV modifications
I made some modifications in anticipation of our upcoming trip. I modified the plumbing, replacing the water tank low point drain with a fixture that allows a garden-type hose to be attached. This allows the RV to be filled through the bottom, eliminating the need to open the RV so that the fill hole can be accessed. The white knob at the end is a plug to keep dirt from getting into the plumbing:

I also added switches that allow the solar panel to charge either battery, and the coach to run off of either battery:

The RV came with an oven, which we use for dairy, but I wanted to add a second oven for meat:

Removed the oven and cut out the cabinetry below. I didn’t notice the wheel well until this point. Grr!

New gas plumbing added:


The fitting that goes into the wall is a bulkhead adapter. The hose for the catalytic heater attaches on the far side.

I had to add risers to that the second oven could fit in above the wheel well:

Lower oven installed. I pulled off the range components.

To prevent the steam from the lower oven from entering the top oven, I built a duct out of sheet metal:

Duct installed:

Top oven installed:

Lower oven duct behind top oven. The lower oven is recessed by 1.5” to allow the duct to come up behind the top oven:

Here it is with the splash plate on. The splash plate and grill are removed before the RV is closed due to clearance issues:

Works great!
Sorento modifications
Since our Odyssey is no more, I had to make modifications to our newly-purchaed 2007 Kia Sorento to get it ready for towing.
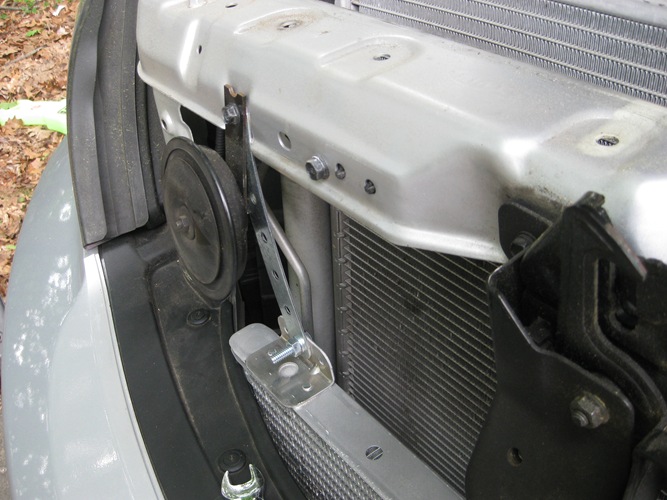
I installed the same transmission cooler I had installed in the van. I hung it off the horn’s mount points:


This picture was taken standing on the driver’s side. The two breakers for the charge line and the brake controller are on the left:
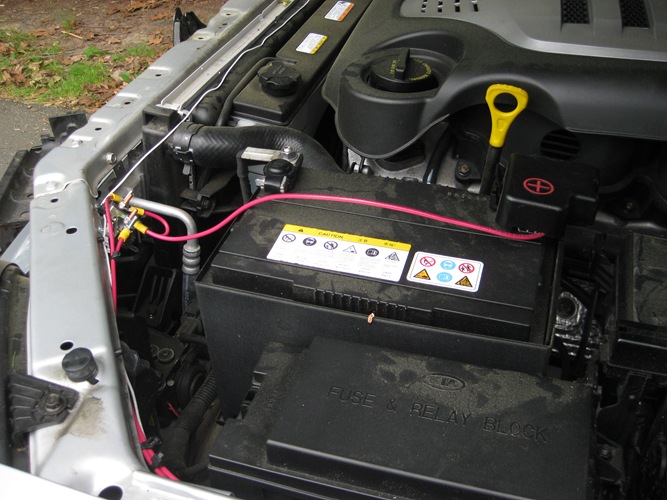
More wiring. Charge line, brake line, and power line for brake controller. The white wire is the signal wire for the transmission temperature gauge:

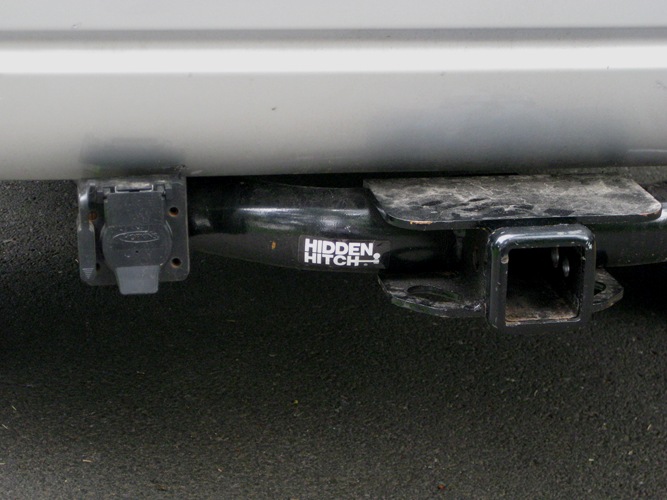
Installed a hitch and 7-way wiring harness. The Sorento has a modular connector that plugs into an adapter that provides turn and brake signals. I had to splice into the drivers side rear light cluster to get a reverse line. The brake control and charge lines came down from the engine compartment and run along the bottom of the chassis:
This picture is taken looking up under the car. The front of the Sorento is to the left. The red thing right of center is the inline transmission fluid temperature sensor. It’s mounted on the supply hose from the transmission. From there, the fluid is routed to the bottom-most hose (the one with the reddish coating), which is the supply line for the radiator’s transmission cooler. From there, the fluid is given to the factory cooler (the next hose up, with the black clip). The third from the bottom is the return from the factory transmission cooler, and it’s routed to the upper right hose on the temperature bypass (the blue thing – this is needed so that we don’t turn the transmission fluid to molasses in the winter). The fluid then leaves the upper left of the bypass, goes to the new transmission cooler, and returns via the lower left. The lower right connector then returns to the transmission.
After attaching the two left connectors, I realized I could get the hoses on much farther if I first coated the barb with a bit of transmission fluid as a lubricant. Oh well, it seems to be OK even though they’re not pushed on all the way.
The temperature sensor’s ground wire is attached by nylon cable tie to the surface of the sensor. It’s the white wire that goes to the bottom of the frame. Note the second cable tie for strain relief.

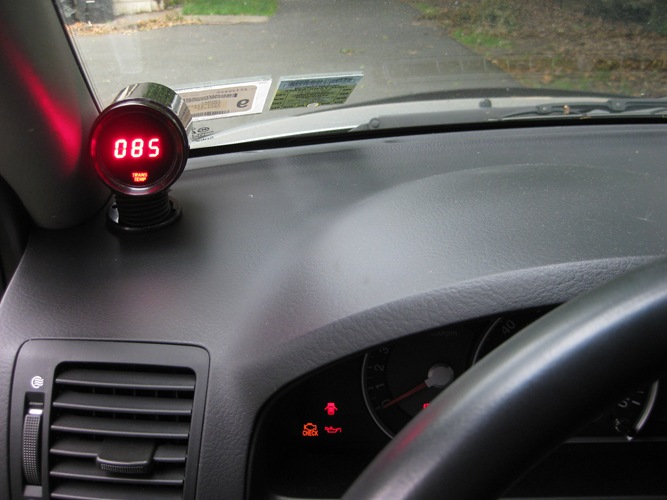
Here’s the temperate gauge mounted on the dash:
The brake controller, mounted to the change tray:
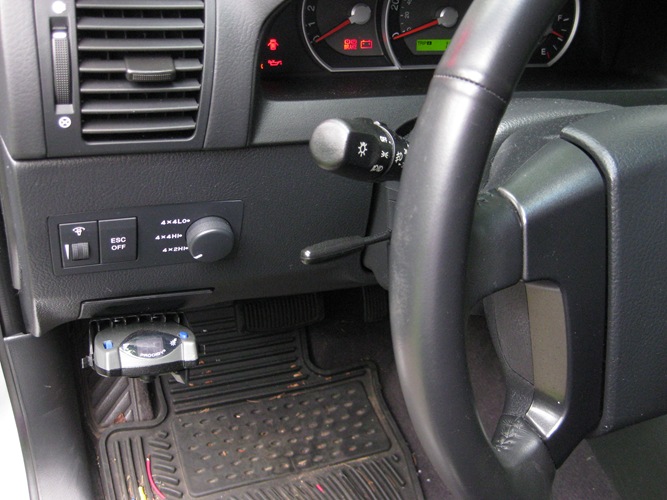
It’s a ton of work! I hope we have this vehicle for a long time!
Roughing it
When we went to Green Mountain to look for dispersed camping locations, some of the roads were pretty bad, and I wondered if we could get the RV up there. After seeing this video, I have no fear:
What is “camping”?
From the Thataway Blog:
When you get right down to it camping has nothing to do with where you sleep and change your clothes. It doesn’t matter if you get your milk out of a fridge or an ice chest or whether you cook over a campfire, a Coleman stove or in a microwave/convection oven in your Mini Winnie. Camping is just being away from home free to do what you like because you left your guilt bag behind. It’s the people you’re with, the deeply gratifying thoughtful and funny conversations with family and good friends you never seem to have enough time for. It’s eyes that sparkle just because you’re all together and the stress is gone.
Camping is unleashing your spirit and letting it run joyously free like a dog chasing gulls on a beach.
And when you go home, as you must, your heart is happy knowing you’ll do it again.
Catalytic Heater
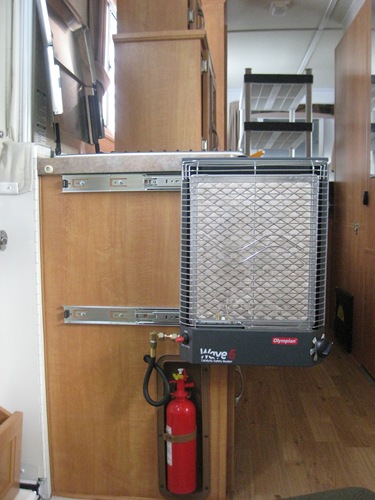
I installed a catalytic heater in the RV this weekend:

It’s an Olympian Wave 6. The advantage of a catalytic heater is that it requires no electricity, so it’s perfect for boondocking. Also, it creates Carbon Dioxide as a bi-product, not Carbon Monoxide, so it’s safe to have it in an enclosed space. The only caveat is that it does consume oxygen, so the windows have to left open a 1/2 inch or so to provide enough ventilation that the oxygen in the interior in replenished.
The door assembly of the RV folds inward when the RV is folded down, so I had to mount the heater on rails so that it can be moved out of the way before folding up the RV.
Here it is in position when in use:

And here it is when it’s been moved over:
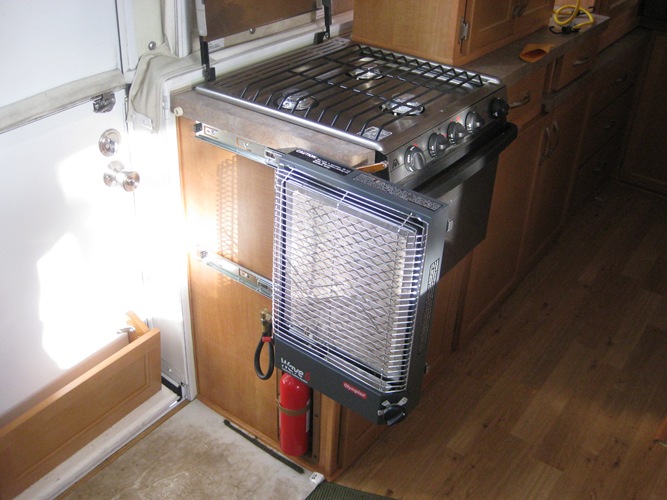
Here’s the view on the inside of the cabinet. I had to cut the copper propane line and install a "T" for the heater. I used my fancy new flaring tool and, yes, the first time I did forget to put the flare nut on the line before flaring the pipe end. Grr!

RV modifications
Before our Asseteague Island trip, I installed a solar system on the RV. I used a Sun-130 panel when they were $1.98/watt. The panel is bolted to aluminum L-channel, which is attached to the roof using double-sided sticky tape.
Yes, that’s right, tape. It’s 3M 4950 VHB tape. It’s $50 a roll. See what it can do here.

The panel is about five feet wide. The wiring harness comes down under the conduit at the panel’s lower right, and down the side of the RV to the left of the window, and down the arm (see the cable ties?):
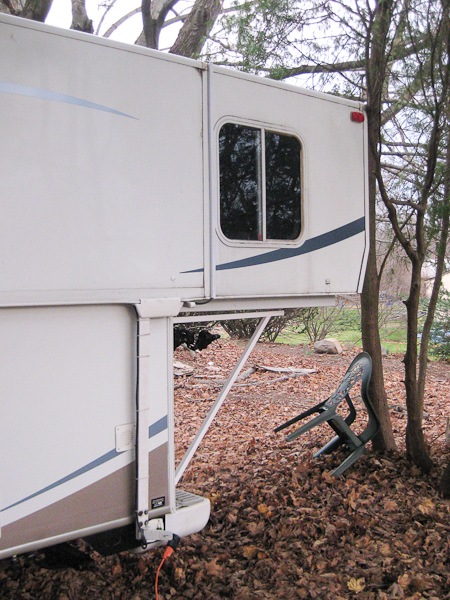
…Then into the battery compartment where it attaches to the ProStar-15 charge controller:
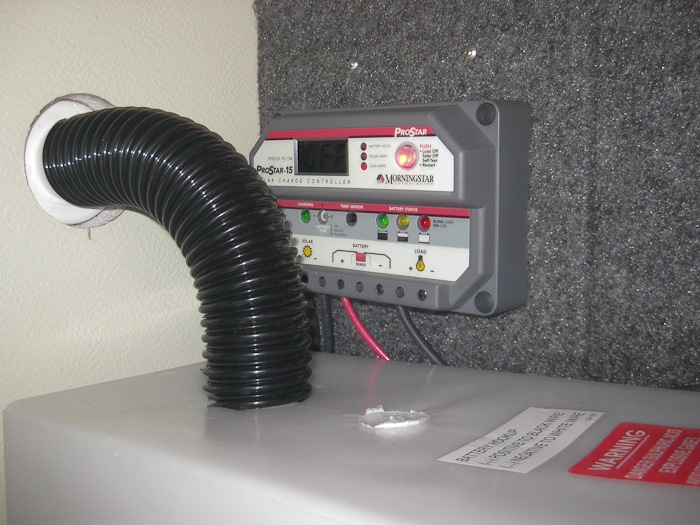
That’s about it. By 11am every day, the battery was fully charged!
![]()
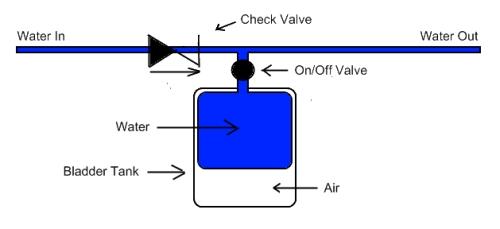
Over Thanksgiving weekend, I installed a pair of pre-charged pressure tanks in the RV. Without a pressure tank, the moment you turn on the faucet, the pump turns on to maintain pressure in the line between the pump and the faucet. Adding the tanks allows us to run several gallons through the faucet, then the pump runs for several minutes to fill the tanks.
Here’s how the tanks work:


The tank hangs on the line between the pump and the faucet, like this:
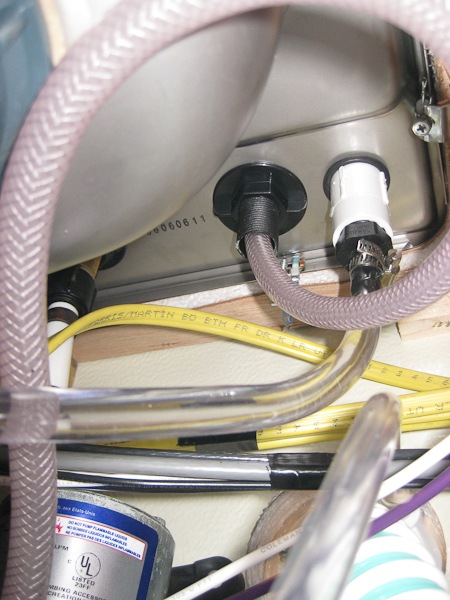
To do the install, I cut the supply line where it enters the water heater. I used this type of “T” connector since the original line is PEX and I’m using CPVC:

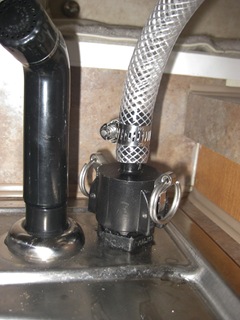
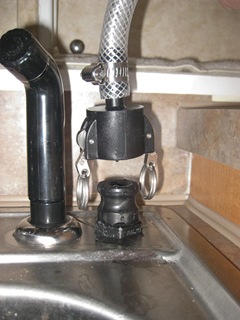
At the top of the part I added, there’s a hose barb, that attaches to a clear hose that attaches to a fitting installed in the sink backsplash:
Here’s the top side. It’s a Banjo camlock connector. It’s a quick release connector for pressurized water systems:

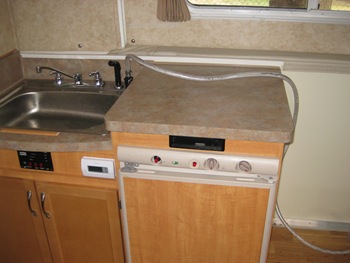
From there, the hose runs over to the dining room bench, where the tanks live. The hose will be behind a shelving system that goes in that gap, so it won’t be so obvious.

The tanks are installed in the bench:

And that’s about it! The tanks supply about 3.5 gallons before the pump comes back on.
Oh, I also swapped out the analog thermostat for a programmable digital one:

I’ll be installing a catalytic heater next.

